

THE GOBLET SQUAT · STRENGTH AFTER 40
Every time you rise from a low couch, lift a laundry basket or climb out of the car, you are doing some version of a squat. Learning to do it well, with a little load, is one of the most practical strength investments you can make.
The goblet squat is often the first loaded squat coaches teach, and for good reason. Holding a single dumbbell or kettlebell at your chest makes it easier to stay upright, find your depth and feel balanced. This guide walks through the setup, the questions people ask most about depth and knee position, the common form problems and their fixes, and a progression that starts with a chair and grows into a staple of your strength routine.
Why the goblet squat earns its place
Squatting is one of the fundamental human movement patterns, and Stature™’s overview of the six movement patterns explains why a balanced program trains it every week. The goblet version, according to the National Academy of Sports Medicine exercise library, mainly works the quadriceps and glutes, with the hamstrings, adductors and the muscles of the hips and trunk working as stabilizers.
What makes the goblet squat especially useful is the position of the weight. Held close to the chest, it acts as a counterbalance that lets you sit between your hips rather than tipping forward, and it gives your trunk muscles a clear job. It needs only one piece of equipment, takes up very little space and scales easily: a light bell for learning, heavier ones as you get stronger.
The equipment question matters less than many people assume. The 2026 American College of Sports Medicine position stand on resistance training, which synthesized 137 systematic reviews, found that equipment type, including machines versus free weights, did not consistently affect outcomes. A single dumbbell at home can therefore do much of the work of a squat rack, particularly in your first year of training.
How to do a goblet squat, step by step
Start light, even lighter than you think you need. The first few sessions are about learning the shape of the movement, not testing your strength.
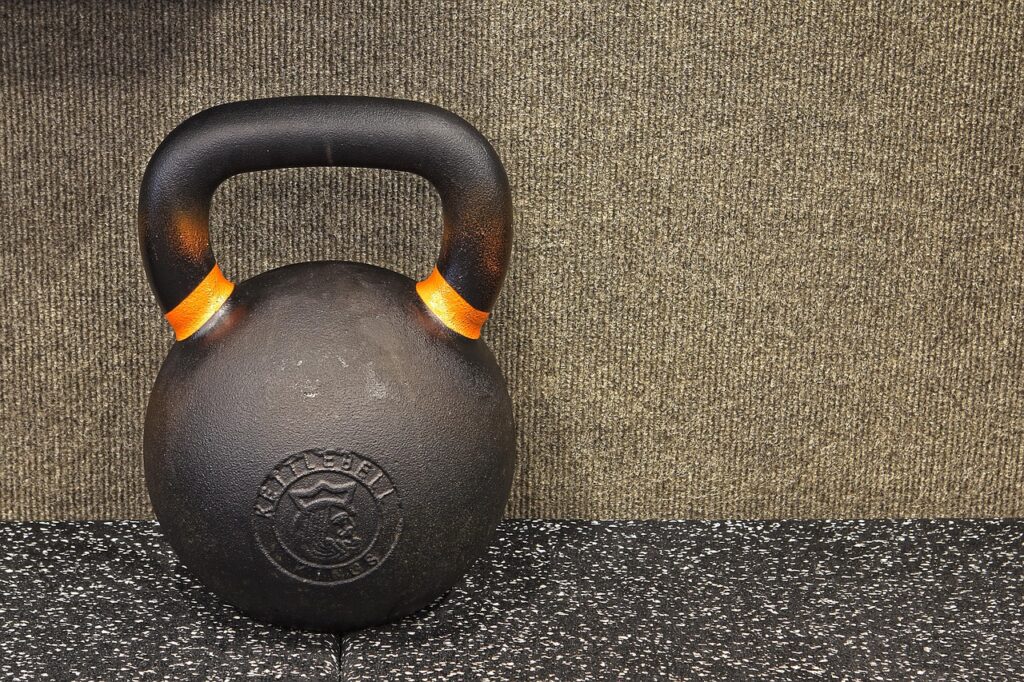
- Hold the weight. Grip a kettlebell by the horns or cup the top end of a dumbbell in both hands, holding it upright against your chest with elbows pointing down.
- Set your stance. Stand with feet about hip-width apart or slightly wider, toes turned out a little, and weight spread across the whole foot with a slight bias toward the heels.
- Brace. Take a breath in, gently tighten your midsection as if preparing for a light poke in the stomach, and keep your chest tall.
- Sit down between your hips. Bend your knees and hips together, letting the knees travel forward and out in line with your toes. Keep the weight snug to your chest.
- Find your depth. Lower until your thighs are roughly parallel to the floor, or as far as you can while your heels stay down and your back stays long.
- Stand up. Press the floor away through your whole foot, exhale as you rise, and finish tall with your hips fully extended.
Move with control on the way down and with intent on the way up. A smooth two- or three-second descent helps you learn the pattern and keeps the joints comfortable.
How deep should you go, and where should the knees travel?
Two pieces of old gym advice still cause confusion: never squat below parallel, and never let your knees pass your toes. Both deserve a closer look. In a 2003 study in the Journal of Strength and Conditioning Research, Fry and colleagues compared barbell squats with and without forward knee movement. As Physio Network summarizes, restricting the knees reduced knee torque by about 22 percent but increased hip torque by about 1,070 percent, shifting stress toward the hips and lower back.
In other words, some forward knee travel is normal and usually helpful. What matters more is that the knees track in the same direction as the toes and that the heels stay planted. On depth, a 2013 review by Hartmann and colleagues in Sports Medicine is widely cited for its conclusion, described in this summary by The Barbell Physio, that deep squats do not raise the risk of injury to passive tissues and that they are safe for most athletes.
That does not mean everyone must squat as low as possible. Your useful depth is the deepest position you can reach with heels down, a neutral back and no pain. If you have knee osteoarthritis, a past injury or a joint replacement, a slightly shallower range or a box squat is a perfectly good choice, and a physical therapist can help you set it. Stiff ankles often limit depth, and our ankle mobility exercises can help.
Fixing the most common form problems
NASM lists knees caving inward, leaning too far forward, cutting the range short, jerky movement and letting the weight drift away from the body among the frequent mistakes. Most have a simple fix.
| What you notice | Likely cause | Try this |
|---|---|---|
| Knees drift inward on the way up | Load too heavy, or hips not yet controlling the knees | Lighten the weight and think “spread the floor” with your feet |
| Heels lift | Limited ankle mobility or stance too narrow | Widen your stance slightly and turn the toes out a touch |
| Chest drops and back rounds | Weight held too far from the body, or depth beyond current mobility | Pull the bell tight to the sternum and stop a little higher |
| Falling backward at the bottom | Weight shifted onto the heels only | Keep pressure across the whole foot and reach the bell slightly forward |
| Bouncing out of the bottom | Rushing the descent | Lower over three seconds and pause briefly before standing |
A phone video from the side and the front, taken once every few weeks, is one of the most useful coaching tools available. Watch for knees tracking over the toes, heels staying down and the chest staying tall.
A progression from chair to heavier bells
Move to the next stage when you can complete every set of the current one with good form and a couple of repetitions to spare. There is no prize for rushing; many people stay at a stage for several weeks.
| Stage | Exercise | Goal before moving on |
|---|---|---|
| 1 | Sit-to-stand from a sturdy chair, arms crossed | 2 sets of 10 with a slow, controlled sit |
| 2 | Bodyweight box squat, lightly touching the chair | 2 to 3 sets of 10 with no plop onto the seat |
| 3 | Goblet box squat with a light bell | 3 sets of 10 with steady form |
| 4 | Free goblet squat to your comfortable depth | 3 sets of 8 to 12 with 2 reps to spare |
| 5 | Heavier goblet squat, a pause at the bottom or a slower lowering phase | Keep adding small amounts as form allows |
Eventually, the goblet squat may become limited less by your legs than by how heavy a bell you can hold at your chest. At that point, many people add single-leg work such as split squats, or move to a front squat or barbell squat with coaching.
Fitting the goblet squat into your week
The ACSM position stand’s central benchmark is training all major muscle groups at least twice a week. For strength, it highlights heavier loads of around 80 percent of your one-repetition maximum for 2 to 3 sets per exercise; for muscle size, it points to higher weekly volume of roughly 10 sets per muscle group. NASM suggests 3 sets of 10 to 15 repetitions for the goblet squat, adjusted to your load and capacity.
For most people, that translates into goblet squats on two non-consecutive days, three sets each, in a rep range where the last two repetitions feel challenging but clean. Pair them with a hinge such as a Romanian deadlift, which our hip hinge guide teaches, plus a push and a pull for a balanced full-body session. When choosing reps and progression, our guide to sets and reps goes deeper.
Warm up first with a few minutes of easy movement and a set of bodyweight squats. If you have heart disease, high blood pressure, diabetes, kidney disease, a recent injury or surgery, new symptoms, or you are pregnant, speak with your doctor before starting or increasing resistance training. Stop if you feel sharp pain in the knees, hips or back, and get it checked if it persists.
FIRST-SESSION CHECKLIST
Your first goblet squat workout
- Choose a light dumbbell or kettlebell and place a sturdy chair behind you as a depth guide.
- Do 10 sit-to-stands without weight to rehearse the pattern.
- Perform 3 sets of 8 to 10 goblet box squats, resting about 90 seconds between sets.
- Film one set from the side and check that your heels stay down and your chest stays tall.
- Write down the weight, sets, reps and how many reps you had left, so next time you know where to start.
This article is for general information and is not a substitute for personal medical advice.
Are you a fitness or wellness professional with a member journey to share?