




BANDS · STRENGTH AFTER 40
You want to keep building strength, but the gym is not always convenient, and a rack of dumbbells takes up more room than you have. A set of elastic bands may be the most practical strength tool you can own.
This guide explains what the research says about bands, how to choose and anchor them safely, and a complete resistance band workout that trains every major muscle group in about half an hour. It also shows how to keep progressing, so the routine stays challenging for months rather than weeks.
Do bands really build strength?
Bands can look like physical therapy props, so it is fair to ask whether they deliver real results. A 2019 systematic review and meta-analysis in SAGE Open Medicine pooled eight studies comparing elastic resistance with conventional training on machines or free weights. The authors found no difference in strength gains for the upper or lower body and concluded that elastic resistance training “is able to promote similar strength gains to conventional resistance training.”
The American College of Sports Medicine reached a similar view in its 2026 resistance training position stand. Reviewing the evidence for healthy adults, it reported that elastic bands, bodyweight exercises and home-based routines yield marked benefits for strength, muscle size and physical function. As one of its authors, Stuart M. Phillips of McMaster University, put it: “Whether it’s barbells, bands, or bodyweight, consistency and effort drive results.”
Bands also behave differently from weights. Their resistance rises as they stretch, so each rep is lightest at the start and hardest near the end. That suits many pressing and pulling movements, and it tends to feel gentle on joints at the beginning of the range.
Choosing and caring for your bands
Most bands come in color-coded levels from light to extra heavy, but colors are not standardized across brands, so judge each one by feel. A starter set should include at least three resistances, because your legs and back can handle far more tension than your shoulders and arms.
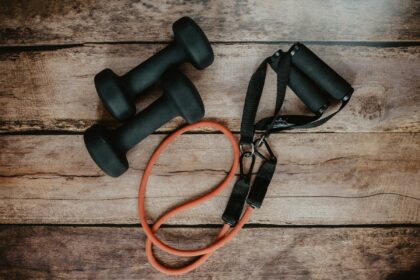
- Tube bands with handles: comfortable for rows, presses and curls; many sets include a door anchor.
- Large loop bands: closed circles that work well for squats, deadlifts and anchoring around a post.
- Flat therapy bands: long and light, useful for shoulder and upper-back work.
- Mini bands: small loops worn around the thighs for hip exercises.
Bands do wear out. A patient guide from OrthoBethesda, an orthopedic practice in the Washington, DC, area, advises checking bands for nicks, tears or punctures and replacing any damaged band before you exercise. It also warns against stretching a band more than three times its resting length, because overstretching can make it snap back toward your head or face. Keep bands away from sharp objects, take off rings before training, and choose latex-free bands if latex bothers your skin.
How to anchor bands and set tension
A secure anchor is the single most important safety step, and the OrthoBethesda guide stresses making sure the band is firmly tied or anchored before you start. Place a door anchor on the hinge side of a closed door that opens away from you, so the door cannot swing open mid-set. Around a post or a heavy piece of furniture, loop the band low and test it with a firm tug before loading it.
You adjust tension by changing where you stand. Step farther from the anchor, or shorten your grip on the band, and the resistance climbs. Step closer and it eases. That makes it simple to fine-tune each exercise without switching bands.
Control the return on every rep. If the band pulls you back quickly, you lose much of the training effect, and a fast snap back is how most band mishaps happen.
The full-body resistance band workout
Do this resistance band workout two or three days a week, with at least one day between sessions. ACSM recommends training every major muscle group at least twice weekly, with two to three sets per exercise for strength, and the CDC’s adult guidelines likewise call for at least two days of muscle-strengthening activity a week. Warm up for five minutes first with marching in place, arm swings and a few bodyweight squats.
| Exercise | Main muscles | Sets × reps | Key cue |
|---|---|---|---|
| Banded squat | Thighs, hips | 2–3 × 10–15 | Stand on the band, hands at shoulders, sit back and down |
| Seated row | Upper back, biceps | 2–3 × 10–15 | Band around your feet; draw elbows back and squeeze shoulder blades |
| Chest press | Chest, shoulders, triceps | 2–3 × 10–15 | Anchor behind you at chest height; press forward without shrugging |
| Romanian deadlift | Hamstrings, glutes, back | 2–3 × 10–15 | Stand on the band; hinge at the hips with a long, neutral back |
| Overhead press | Shoulders, triceps | 2–3 × 8–12 | Stand on the band; press up without arching your lower back |
| Lateral band walk | Outer hips | 2–3 × 10 steps each way | Mini band above the knees; stay low and step wide |
| Pallof press | Core | 2–3 × 8–10 per side | Anchor at your side; press straight out and resist the twist |
Pick a tension that leaves about two or three good reps in reserve at the end of each set. Rest 60 to 90 seconds between sets. Short on time? Pair an upper-body and a lower-body exercise and alternate between them.
Breathe out during the hardest part of each rep and avoid locking your elbows or knees at the end of the range, two points the OrthoBethesda guide also makes. Smooth, controlled reps count for more than fast ones.
How to progress with bands
The principle is the same as with weights: ask a little more of your muscles over time. Our guide to progressive overload explains the idea in depth. With bands, the options usually run in this order.
- Add reps until you reach the top of the range on every set.
- Step farther from the anchor or shorten your grip to raise the tension.
- Move up to the next band, or combine two bands.
- Slow the lowering phase to a count of three.
- Switch to a harder variation, such as a single-leg Romanian deadlift or a split squat.
Once the basics feel solid, bands also lend themselves to power work. ACSM’s position stand describes power training with moderate loads, moved as quickly as possible during the lifting phase, and our article on power training explains why speed of movement is worth training too.
Pairing bands with weights and body weight
Bands do not have to replace other equipment. Many people use them for travel weeks and busy days, or as a supplement to gym sessions, for example band pull-aparts for the upper back or band-assisted pull-ups. If you are still finding your footing with strength work, our guide to starting strength training walks through the first month and the basic movements bands can support.
The deciding factor is whether you train at all. In ACSM’s announcement of the new position stand, Phillips noted that “The best resistance training program is the one you’ll actually stick with.” If a bag of bands by the door means you train twice a week instead of once, that alone is a real upgrade.
Check in before you start
Bands are low-impact, but they are still strength training. Talk with your doctor or physical therapist first if you have heart disease, diabetes, kidney disease or high blood pressure, are pregnant, or are recovering from an injury or surgery. The OrthoBethesda guide advises stopping immediately and seeking advice for sharp pain, shortness of breath, dizziness or light-headedness. Mild soreness in the first few days is expected; pain that lasts beyond three or four days deserves a professional opinion.
BAND BASICS
Your first band session checklist
- Inspect every band for nicks, tears or punctures.
- Test your anchor with a firm tug before you load it.
- Warm up for five minutes.
- Do one set of each exercise in the table, choosing a tension that leaves two or three reps in reserve.
- Note the band and stance you used for each move, so next time you can add a little more.
This article is for general information and is not a substitute for personal medical advice.
Are you a fitness or wellness professional with a member journey to share?