



INDOOR ROWING · ACTIVE LIVING
You want a workout that lifts your heart rate, uses your whole body and goes easy on sore knees, and the machine in the corner of the gym keeps catching your eye.
The rowing machine is one of the most efficient pieces of cardio equipment you can use, yet it is also one of the most misunderstood. Many people sit down, grab the handle and pull hard with their arms, then wonder why their back aches and their legs feel untouched. This guide explains what a rowing machine actually trains, how to learn the stroke in the right order, which settings matter, and how to build a simple plan that fits alongside walking, cycling and strength work.
Why the rowing machine earns a place in your routine
Rowing is seated, which removes the pounding that comes with running or jumping. Exercise physiologist Katie Lawton, MEd, told Cleveland Clinic that “not being in an upright position really takes pressure off your body,” and she adds that on a rower you can still “send your heart rate through the roof if you go hard enough.” Low impact, in other words, does not mean low effort.
That combination makes the machine useful in several situations: as your main form of cardio, as a change of pace from the miles you already walk, or as a way to keep training when your joints need a break from impact. Cleveland Clinic’s overview of rowing machine benefits also points to its accessibility. You control the intensity with every stroke, and the low seat means there is little risk of falling off.
Rowing also counts toward the weekly target in the federal Physical Activity Guidelines for Americans: at least 150 to 300 minutes of moderate-intensity aerobic activity, plus muscle-strengthening activity on at least two days. If you want a fuller picture of how cardio sessions fit together across a week, our guide to building cardio fitness from easy miles to intervals is a good companion to this one.
What a rowing machine works, and what it doesn’t
A good stroke starts with the legs. British Rowing’s technique guide estimates that roughly 60 percent of the power comes from the legs, 30 percent from core tension and only 10 percent from the arms. Cleveland Clinic lists the legs, upper back and core, including the abdominals, lower back, obliques, glutes and hamstrings, as the main muscles involved.
There are limits worth knowing. Indoor rowing moves you in a single plane, forward and back, so it does not train side-to-side or twisting movements. It also does not replace dedicated strength training. The pull of a rower is light compared with a loaded row or deadlift, so keep lifting on two or more days a week. Our guide to row exercises for a stronger back covers the weighted versions that build the muscles rowing relies on.
Learn the rowing machine stroke: catch, drive, finish, recovery
Every stroke has four parts, and the order of movement is the whole secret. British Rowing summarizes it as legs, body, arms on the way out and arms, body, legs on the way back.
- Catch. Sit tall with your knees bent, shins close to vertical and arms straight. Your knees should be over your ankles, and your body leans slightly forward from the hips.
- Drive. Push the floor away with your legs first. Once the legs are nearly straight, swing your torso back slightly, then draw the handle in with your arms.
- Finish. Legs are long, your body leans back a little, and the handle arrives at your lower ribs or breastbone, not your chin or stomach.
- Recovery. Reverse the sequence. Straighten your arms, tip your body forward from the hips, and only then bend your knees and slide back to the catch.
British Rowing suggests a rhythm of two counts for the drive and three for the recovery, so the return is slower than the push. Its guide describes the body rocking from the hips between eleven and one o’clock on a clock face, with a long back and relaxed shoulders. Strap your feet so the strap crosses the ball of each foot.
Damper, stroke rate and other settings that confuse beginners
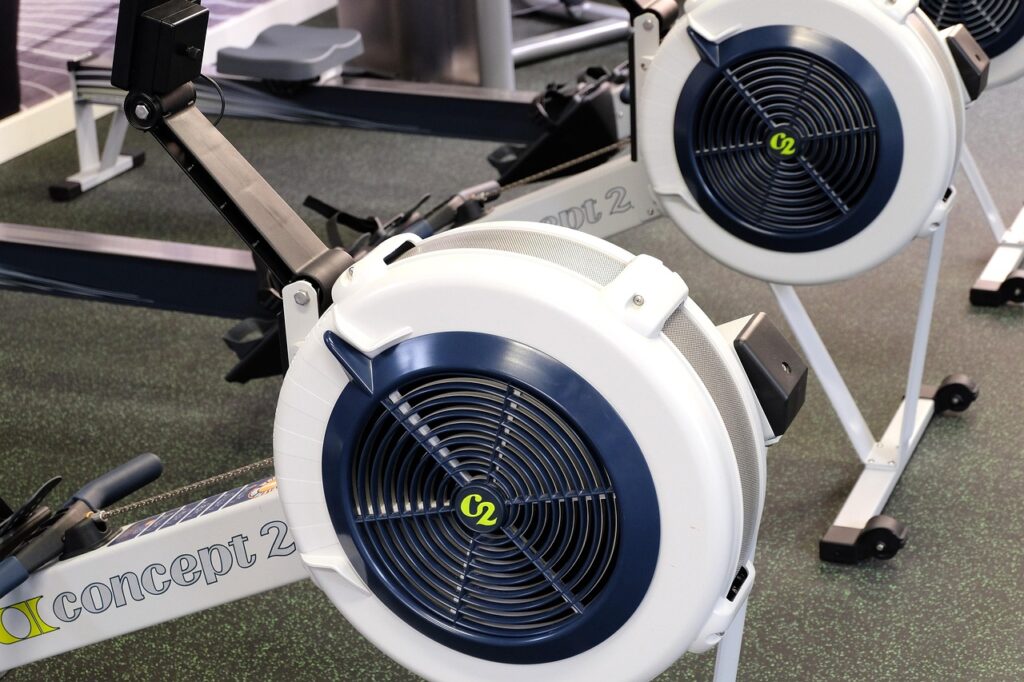
The lever on the side of an air rower is the damper. It controls how much air reaches the flywheel, and a higher setting makes each stroke feel heavier, a bit like a bicycle in a harder gear. Heavier is not better for most people. British Rowing recommends keeping the damper at four or below while you learn, so you can hold good technique for longer.
The monitor usually shows strokes per minute, often labeled “spm.” Faster is not automatically harder; rushed strokes tend to be short and weak. British Rowing suggests spending time at lower rates of 18 to 24 strokes per minute to work on technique. A smooth, steady rhythm that keeps the flywheel spinning is the goal.
How rowing compares with other cardio
Calorie figures are rough estimates that vary with body size, effort and machine, but they help with comparisons. The table below uses Harvard Health Publishing’s estimates for 30 minutes of activity by a 155-pound person.
| Activity (30 minutes) | Estimated calories, 155-pound person | Impact on joints |
|---|---|---|
| Rowing machine, moderate | 252 | Low, seated |
| Stationary bike, moderate | 252 | Low, seated |
| Elliptical trainer, general | 324 | Low, standing |
| Swimming, general | 216 | Very low, supported by water |
| Walking, 3.5 mph | 133 | Moderate |
The real advantage of rowing is not the number on the screen. It is that one machine asks your legs, trunk and upper back to work together while your heart and lungs keep pace. If you enjoy variety, rotating the rower with outdoor or indoor cycling spreads the load across different muscles and keeps workouts fresh.
A four-week plan to get started
Harvard Health Publishing advises beginning with a few minutes at the lowest resistance, then adding time before adding resistance. Cleveland Clinic suggests that if rowing is your only exercise, you can build toward about 20 minutes of moderate rowing a day. The plan below follows that order: technique first, then time, then effort.
| Week | Sessions | Main set | Focus |
|---|---|---|---|
| 1 | 3 | 5 rounds of 2 minutes easy rowing, 1 minute rest | Sequence: legs, body, arms |
| 2 | 3 | 3 rounds of 4 minutes easy, 1 minute rest | Slow recovery, two counts out and three back |
| 3 | 3 | 2 rounds of 8 minutes steady, 2 minutes rest | Steady rhythm around 20 to 24 strokes per minute |
| 4 | 3 | 15 to 20 minutes steady, with 4 short pushes of 30 seconds | Stronger leg drive, same smooth form |
Warm up with three to five minutes of very easy rowing and finish the same way. “Easy” means you could hold a conversation; “steady” means you can speak in short sentences. If a week feels hard, repeat it rather than moving on.
Common mistakes and how to row safely
Most rowing problems trace back to the order of movement or to posture. Cleveland Clinic and British Rowing flag the same handful of errors:
- Pulling with the arms first. This wastes energy and loads the shoulders. Let the legs start every stroke.
- Hunching forward. A rounded back and dropped head can strain the upper and lower back. Think tall, with your ribs stacked over your hips.
- Pulling to the chin. A high finish stresses the shoulders. Bring the handle to the lower ribs.
- Knees flaring out. Keep knees tracking in line with your feet.
- Bending the knees too early on the way back. If the handle has to lift over your knees, your arms and body were not set first.
Getting on and off deserves attention too. Physical therapist Vijay Daryanani notes in Harvard’s article that “the tricky part of using a rowing machine is that it’s low to the ground,” so lower yourself with a hand on the frame and stand up the same way. If you have a history of back trouble, keep sessions short while you learn, and read our advice on moving well when low back pain strikes. Check with your doctor before starting or intensifying cardio if you have heart disease, diabetes, kidney disease, new or unexplained symptoms, a recent injury or surgery, or are pregnant.
YOUR FIRST SESSION
A ten-minute rowing checklist
- Set the damper at four or lower and adjust the foot straps across the ball of each foot.
- Row three minutes with legs only, then add the body lean, then add the arms.
- Count two on the drive and three on the recovery for five relaxed minutes.
- Finish with two very easy minutes and note how your back and shoulders feel.
SOURCES AND FURTHER READING
Cleveland Clinic · Top 7 Great Rowing Machine Benefits
Cleveland Clinic · 7 Low-Impact Cardio Exercises To Try
British Rowing · Perfect Your Technique
Harvard Health Publishing · The Best Types of Exercise When You Have Hip or Knee Pain
Harvard Health Publishing · Calories Burned in 30 Minutes for People of Three Different Weights
This article is for general information and is not a substitute for personal medical advice.
Are you a fitness or wellness professional with a member journey to share?